How to Set Up Mailgun Integration in Logistifie
Once you've successfully set up and verified your domain in Mailgun, you will receive a Private API Key and a Domain Name. These credentials need to be configured within Logistifie to enable email functionalities. Follow the steps below to integrate Mailgun with your Logistifie account:
Step-by-Step Guide:
1. Login to Logistifie
After logging in, click on the company logo at the top-right corner of the dashboard to open the menu. Select "Integration" from the dropdown.
2. Open the Mailgun Setup Card
In the Integrations section, locate the Mailgun Setup card and click on it.
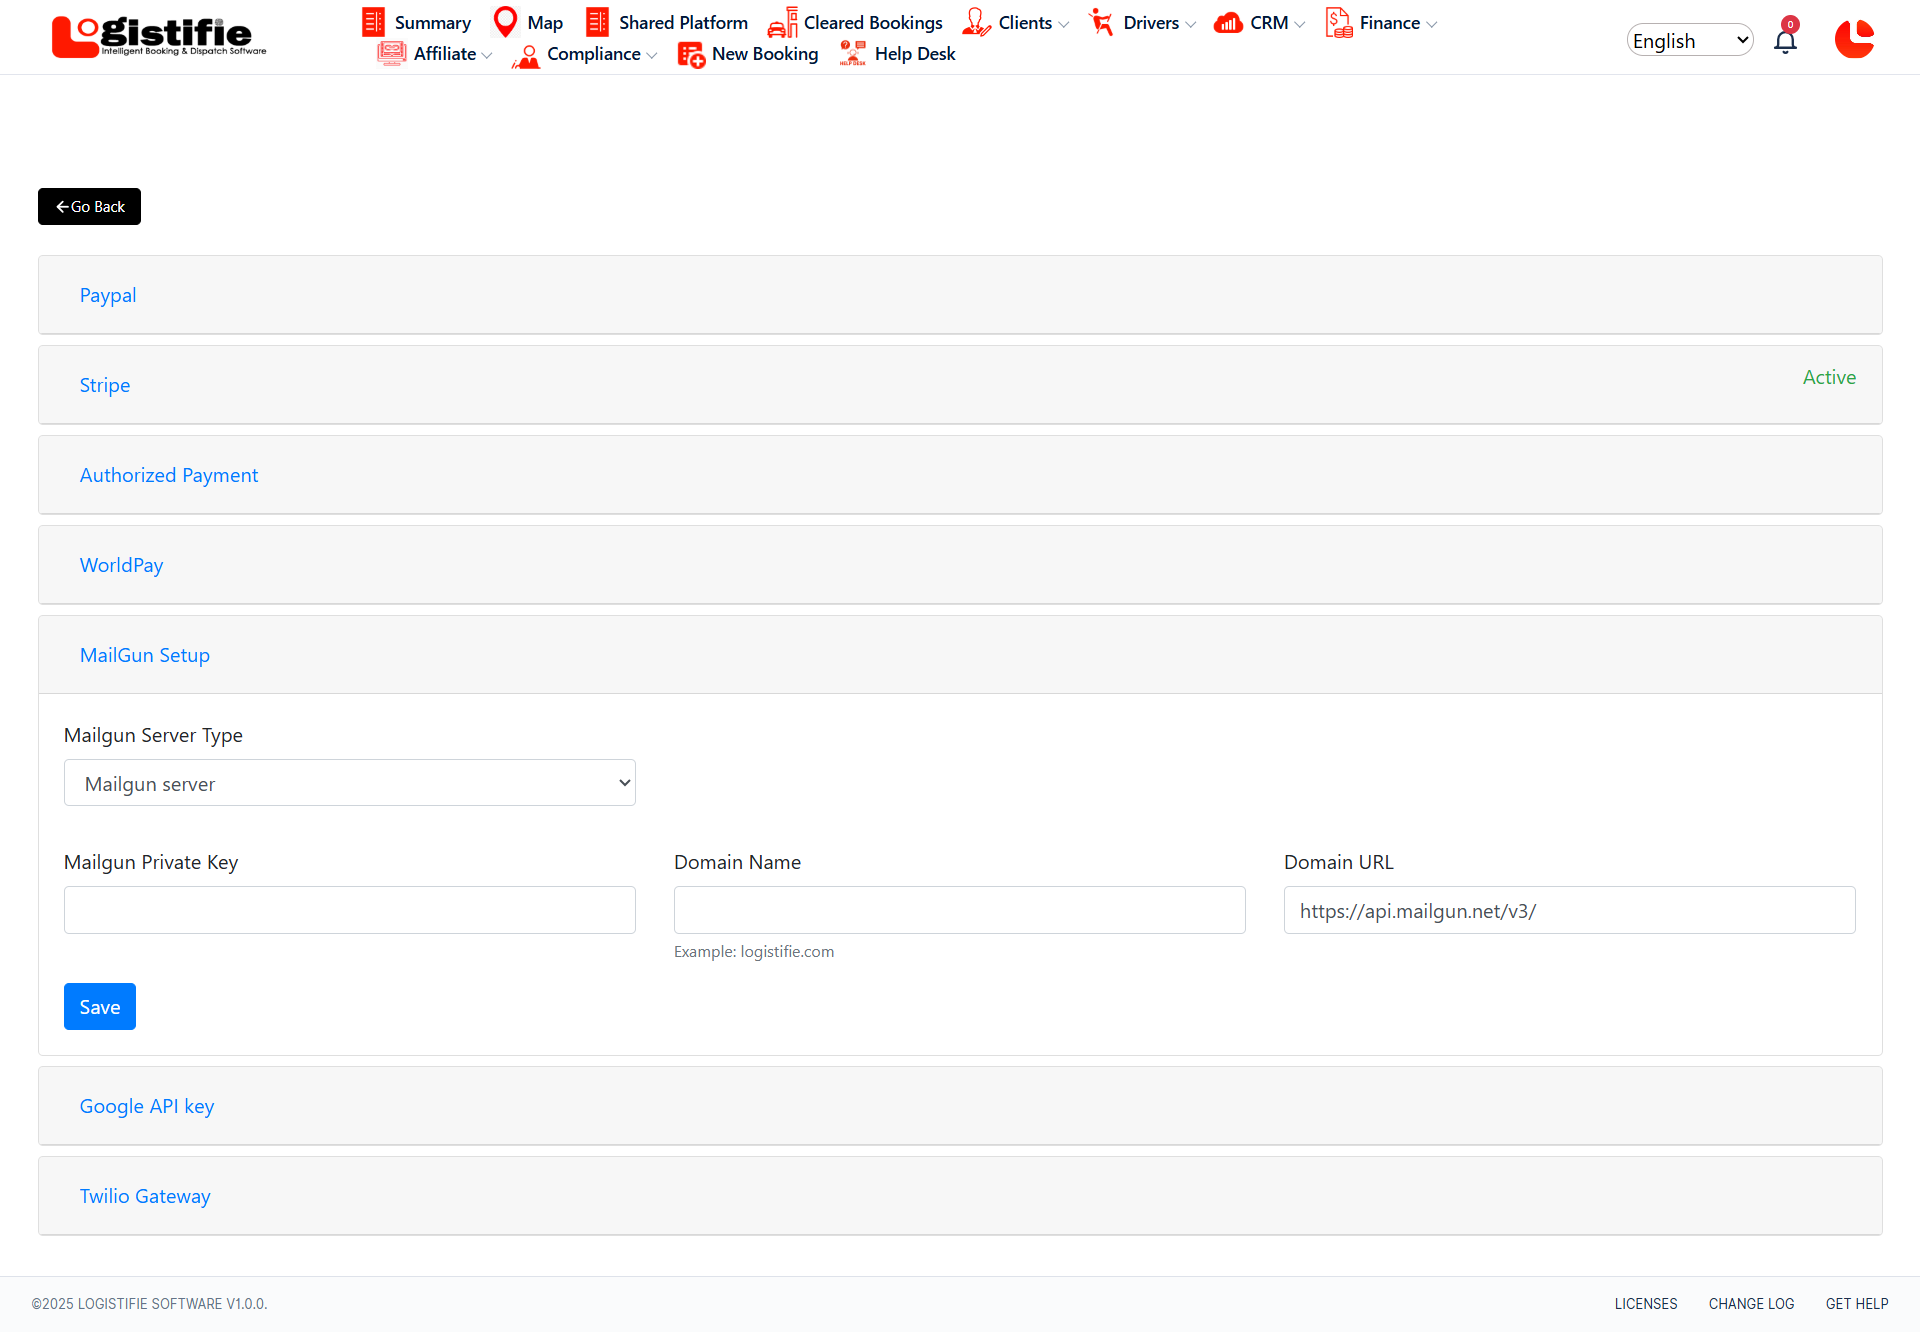
3. Configure Mailgun Credentials
- Server Type: Select 'Mailgun Server' from the dropdown.
- Private Key: Enter the private API key you received from Mailgun.
- Domain Name: Enter the domain name associated with your Mailgun account.
- Domain URL: Use the following URL:
https://api.mailgun.net/v3/(This remains the same for all users.)
4. Save the Configuration
After entering all the required information, click on the Save button to complete the setup.
Your Mailgun integration is now successfully configured in Logistifie. You’re ready to send emails using your custom domain!
Your Mailgun integration is now successfully configured in Logistifie. You’re ready to send emails using your custom domain!
Related Articles
How to Set Up and Verify Your Domain in Mailgun: A Step-by-Step Guide
Overview This comprehensive guide will walk you through the process of adding and verifying a domain in Mailgun, an essential step before you can start sending emails through their platform. Domain verification is crucial as it enables open and click ...How to Integrate a Payment Gateway (Stripe) in Logistifie Dispatch System
Stripe is the supported payment gateway for secure and fast online payments in the Logistifie Dispatch System. Integrating Stripe enables you to receive payments from clients directly through the platform. ✅ Step 1: Navigate to the Integration Panel ...Guide to Setup Logistifie Dispatch System - How to Add a New Tariff in Logistifie Dispatch System
? How to Add a New Tariff in Logistifie In Logistifie, you can manage different types of tariffs to suit various ride types and customer needs. Each tariff is linked to a vehicle category, meaning every vehicle type (like Business Class, Van, SUV, ...Guide to Setup Logistifie Dispatch System - How to Add a New Driver in Logistifie Dispatch System
Whether you're onboarding a freelance driver, a vehicle-owning partner, or a third-party service provider, the Logistifie Dispatch System allows you to add them under different driver types for better job assignment and tracking. ✅ Step 1: Navigate ...⚙️ Complete Guide to the Settings Panel in Logistifie Dispatch System
The Settings section in the Logistifie Dispatch System is where you configure your core system preferences — everything from currency and timezone to invoicing behavior and branding. Whether you're just getting started or fine-tuning your dispatch ...